Get Up and Running with Docker for Windows
When I initially heard about Docker a few years ago, my first reaction was “what an awesome idea”, followed quickly by “shame I can’t use it for my .NET projects on Windows”. I knew that there were some plans for a Windows friendly version of Docker, but every time I looked into it, it felt like things weren't quite ready yet and so besides a few brief experiments, I hadn’t properly given it a try.
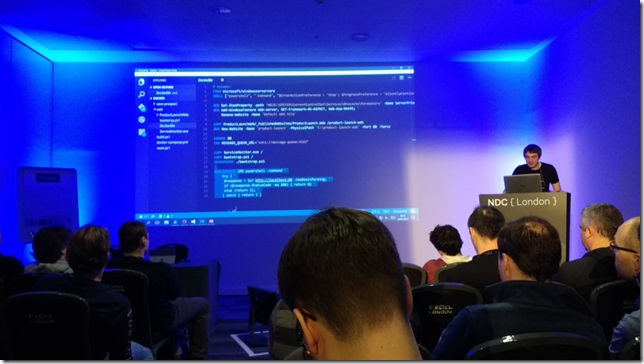
However, last week I saw my friend Elton Stoneman give an awesome presentation at NDC London on the subject of “Dockerizing Legacy ASP.NET Apps” (the video’s not available yet, but check here and I’m sure it will be in the near future).
In his talk he walked us through taking a “legacy” ASP.NET application and "dockerizing" it and then improving it. In just an hour he'd ended up with a solution featuring eight containers - the original ASP.NET application, another web site hosting a custom homepage, two message handling services, elasticsearch, kibana, NATS, and SQL Server Express. Normally something like this would take the best part of a day to get installed on your computer and configured correctly, but he was able to run the whole thing with a simple docker-compose up -d command.
I was seriously impressed. But would I be able to replicate his demo, or was it all smoke and mirrors? I set myself the challenge of trying to run Elton's demo myself, by cloning his git repository, and running docker-compose.
I ended up achieving this on both Windows 10 and Windows Server 2016, and in the rest of this post, I’ll explain what was involved.
What OS?
Now if you're new to Docker, knowing what you are supposed to install for Windows can get quite confusing as there are a few flavours of Docker for Windows support. In this post, I'm going to focus on two main options. First, using Docker on your Windows 10 Pro development machine. And second, using Docker on a Windows 2016 Server which is what you'd typically use for running Windows Docker containers in production.
If you’re stuck on something else like Windows 7 or Windows 10 Home, then I recommend using a VirtualBox VM and installing Windows Server 2016 on that to follow along. I was also able to run this demo in that environment, with a VM with 4GB of RAM.
Let’s start off with getting Docker set up on Windows 10 Pro.
Getting Set Up to Use Docker on Windows 10 Pro
So for running Docker containers on a Windows 10 development machine, we need a few things. First of all, we need the Hyper-V feature of Windows enabled. That means that Win 10 Home is not good enough – you do need the Pro edition. Second, make sure you have installed the latest Windows 10 updates. We'll also need git installed for this demo.
Next, we need to install Docker for Windows. The good news is that as of very recently (v1.13 and above), the “stable channel” installer supports working with both Linux and Windows containers. This is another potentially confusing thing about running Docker on Windows. It offers you a way to use any of the myriad of existing Linux-based containers on Docker Hub, by virtue of a Linux VM it creates for you. But it also lets you use the brand new Windows containers, which is the type of container we're using in this demo.
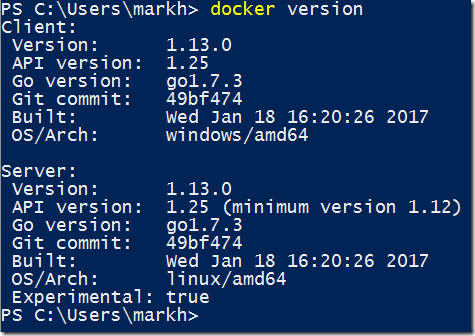
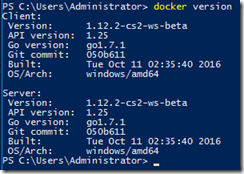
The Docker for Windows installer may need to reboot your machine to install key Windows features, but once its running you'll have a Docker icon in your system tray, and if you go to a command prompt you can type docker version to check it is installed correctly.
If you load up your Hyper-V Manager, you'll spot a new Virtual Machine it's created called MobyLinux.
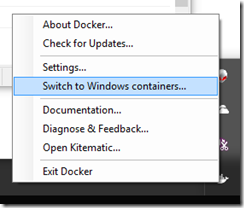
This is what it would use to run Linux containers, but we'll be working with Windows containers in this demo, so right-click your Docker icon and select “Switch to Windows Containers”. Don't worry, it's not as scary as it sounds, you can switch easily back and forth between the two as required.
And that’s it for setting up Windows 10 Pro to work with Docker. I’ll talk you through Windows Server 2016 as that’s slightly different next, and then we’ll get on to actually running Elton’s demo app.
Getting Set Up to Use Docker on Windows Server 2016
For trying this out on a Windows Server 2016, you need a fresh install of Windows Server 2016, and then run Windows Update to get all up to date. You can do this in a Virtual Machine if you want (that’s what I did).
Now for Windows Server, we're not going to install Docker for Windows. Instead, we are simply going to enable the container feature of Windows 2016. This will let us run Windows Docker containers which are now a first-class citizen of Windows. Note that we won’t be able to run Linux Docker containers on this machine. It makes sense if you think about it – in production you’d run your Windows containers on a Windows server, and your Linux containers on a Linux server.
You configure Docker for Windows Server 2016 with the following PowerShell instructions (run from an administrator prompt):
Install-Module -Name DockerMsftProvider -Repository PSGallery -Force
Install-Package -Name docker -ProviderName DockerMsftProvider -Force
Restart-Computer -Force
With this in place, you should be able to go to a command prompt and type docker version and see that it is correctly installed.
Another thing you can do to check all is well is check that the Docker service is running, which you can do with the Get-Service docker command:
If it shows as Stopped, then go ahead and start it with Start-Service docker.
For this demo we will need a couple more things installed on our Windows Server. We'll need git installed, and we also want the docker-compose utility.
But it's a real pain installing anything on Windows Server, as it comes with a locked down IE browser that will fight against you downloading anything. So we'll install chocolatey from an administrator PowerShell prompt
iwr https://chocolatey.org/install.ps1 -UseBasicParsing | iex
And now chocolatey will let us install git and docker-compose:
choco install git -y
choco install docker-compose -y
And that’s our Windows Server 2016 set up. We’re ready to see if it really is as simple as running docker compose up -d.
Launching Elton's Dockerized ASP.NET Demo App
Now we have Docker set up on Windows 10 and Windows Server 2016, let's try to reproduce the demo from Elton’s NDC talk. First, we need to get the source code for his demo which we’ll do with a git clone. (I'm working off the v5 version – commit 55ab6f3)
git clone https://github.com/sixeyed/ndc-london-2017
Next, we need to navigate into the src/docker folder, and say docker-compose up -d
This will cause a few things to happen. First of all, it will pull all the necessary Docker images to run this app. Since we've only just set up, this will be slow as some large base images such as microsoft/windowsservercore, microsoft/mssql-server-windows-express and various others will get pulled down. The good news is that this is a one-time operation. Very often you'll reuse the same base images many times over.
And once all the images have been downloaded, docker compose up -d starts all eight Docker containers required for this application (they’re all Windows containers), and connects them together in a network so they can communicate with each other.
If all goes well, you should be able to run the docker ps command to see them all running.
Now on Windows Server 2016, this worked perfectly first time! With just a git clone and a docker-compose up -d, I'd successfully deployed all eight containers necessary to run Elton’s demo app.
Troubleshooting on Windows 10
It wasn't quite as plain sailing on Windows 10, but the problems weren't too difficult to resolve.
First of all, docker-compose refused to run at all, complaining I had the wrong version of the tool. I discovered that by editing the docker-compose.yml file and changing the version to "2.1" instead of "2", docker-compose was able to run, and start creating my containers.
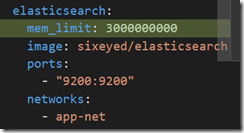
And second, some of my Docker containers failed to start up first time. What we can do to trouble-shoot, is use the docker logs command to see the log output for a specific container. I used docker logs docker_elasticsearch_1 to discover that my elasticsearch container couldn’t start because it didn't have sufficient memory allocated. The elasticsearch image used in this demo is actually Elton’s own Docker image and he mentions in the documentation that it might fail on Windows 10 and that 3GB is a good amount to reserve.
So I added a memory_limit: 3000000000 setting for the elasticsearch container in my docker_compose.yml file and tried again.
By the way, you can safely keep calling the docker-compose up -d command until everything starts up correctly. It works out what still needs to be done.
So with these changes in place, docker-compose up was able to start up the full solution.
Testing Our Dockerized ASP.NET App
But of course, I wasn't happy with just seeing eight containers running. I wanted to know that the app was really functioning. So how can we test Elton's app and prove that our containers really are all communicating with one another?
Well, you’d need to watch the talk to understand how the demo app works, but with a few quick tests we can prove that all eight containers are in fact doing their job.
First of all we need to check the website is running. To do that, we need to find out what the IP address of the website container is. This is one area in which the Docker for Windows tooling could do with improving – we can’t simply navigate to http://localhost to see the site like you typically can when running a webserver in a Linux container.
To discover the IP address of the web server, we use the docker inspect docker_product-launch-web-1 command. This returns a large bunch of JSON in which we can find the IP address of our running container. Note that this IP address will be different every time we restart our containers.
If you don’t want to search through the JSON for the right bit, we can issue a slightly fancier command: docker inspect -f '{{.NetworkSettings.Networks.nat.IPAddress}}' docker_product-launch-web_1 which picks out just the bit we’re interested in.
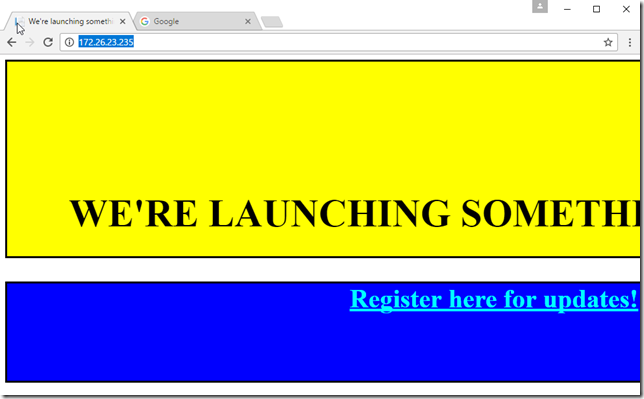
In my example the IP address is 172.26.23.235, so if I load http://172.26.23.235/ in a browser, I see this beautifully designed product launch page complete with a marquee tag and blinking text:
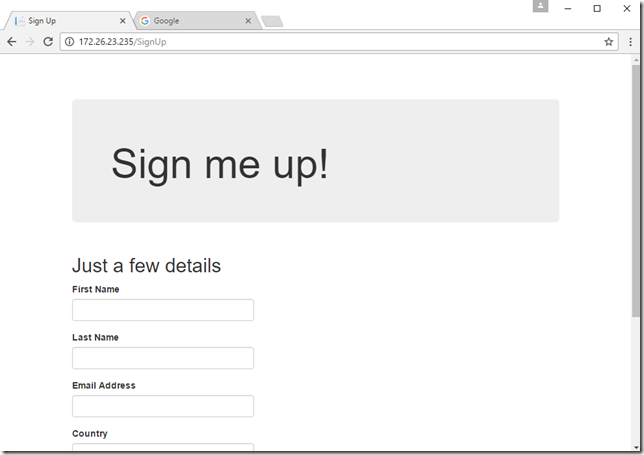
This is actually proving that two containers are working, since the launch page is pulled from a second container running a webserver on another port. If we can manage to click on the “Register here for updates” link while it’s visible, we get to enter our details into a form, which posts a message onto a queue.
By the way, if you’re testing this on Windows Server 2016, we can use chocolatey again to get Google Chrome installed by typing choco install googlechrome so we don’t have to use the annoying locked down IE browser.
There are two listeners on the NATS queue (or “subject”), one which writes a row into a table in our SQL Server Express container, and one which writes a document to elasticsearch.
So let’s prove that the queue, the listeners and the database containers are all working by checking that those messages were received and the data is now in the right place.
To check our database, SQL Server database, we could try to connect to it with SQL Management Studio and explore it that way. But there’s an easier way. With the docker exec command, we can run a SQL command right inside the SQL Server container.
So I can say:
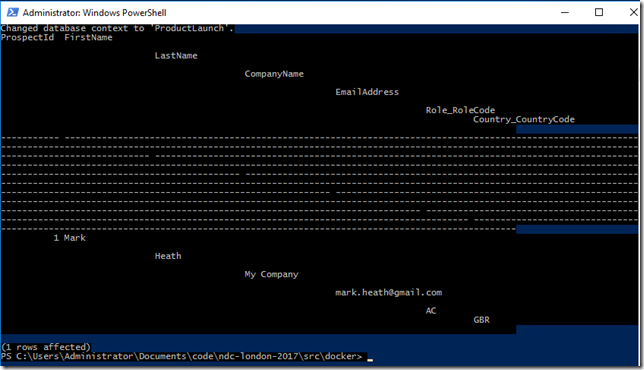
docker exec -it docker_product-launch-db_1 sqlcmd -U sa -P NDC_l0nd0n -Q "USE ProductLaunch; SELECT * FROM Prospects"
This connects to the database container, and runs sqlcmd with the specified username and password (the password that was specified as an environment variable in the docker-compose.yml file) and the -Q switch tells it to run just this SQL and then exit out. If all goes well we’ll see the details of the user we entered in the website:
So great, that proves the queue, the database and one of the message handlers is working.
We just have one more test to perform to prove out the remaining containers. Did the data also make it into elasticsearch? We can use the kibana container to check. First of all we need to find the IP address of the kibana container, which we can use docker inspect -f '{{.NetworkSettings.Networks.nat.IPAddress}}' docker_kibana_1 for.
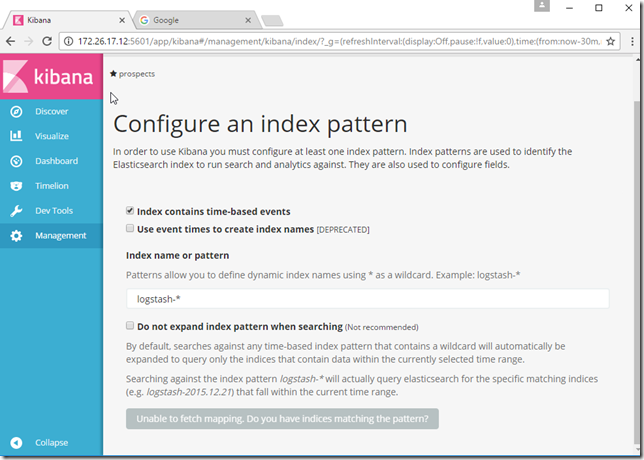
This tells me my kibana is running on 172.26.17.12 and I know (again from the docker-compose.yml file) that its running on port 5601. So if I browse to http://172.26.17.12:5601 then I should see kibana running:
Kibana can be a bit intimidating for new users, but on this initial screen we need to specify an index name of “prospects”, which is the name of the elasticsearch index the details on the register page end up in. Once this has been done you confirm the index mapping and head to the Discover tab where we should see the details we entered appear: 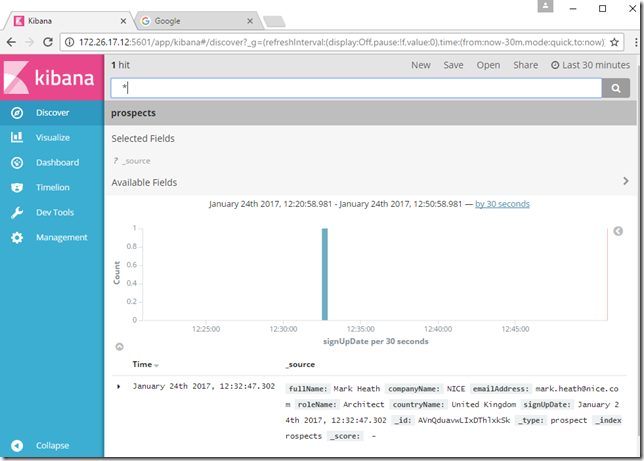
And so it’s mission accomplished. Not only did I get Elton’s eight container demo up and running with a single docker-compose up command, but the system as a whole is working correctly. And all in a fraction of the time it would have taken to manually get this up and running on my developer machine and without me needing to install things like Java and elasticsearch just to try out this demo app.
Cleaning Up
Now if you’ve been following along and this was your first time using Docker, you may be concerned that you’re filling your hard disk up with a bunch of stuff you don’t want to keep long-term. And it’s true that we now have a bunch of Docker “images”, “containers” and “volumes” that we might want to clean up.
Fortunately, the largest of these files, the “images” are mostly ones that you probably want to keep such as microsoft/windowsservercore, as it forms the basis for many other images. But the ones specific to this demo you might want to get rid of.
The easiest way to clean up in this instance is to use docker-compose down which will stop and remove all the containers created for this demo app.
But you will also want to learn some basic commands like docker ps -a to see all containers, docker stop to stop a running container and docker rm to remove a container. There’s docker images to see what images you have and docker rmi to remove one. And the docker volume ls and docker volume rm will let you explore and clean up images.
Pretty much any Docker training course or tutorial will give you details on these and many other useful docker commands. The course I recommend is Wes Higbee’s excellent Pluralsight course Getting Started with Docker for Windows which not only teaches you the Docker basics, but does so from a Windows perspective.
Summary
If you’re a .NET developer who’s been ignoring Docker because it doesn’t seem relevant for Windows, now’s the time to start paying attention. The containerized approach has tremendous benefits for streamlining the development and testing experience, as well as simplifying deployment. If you haven’t tried it yet, why not see if you can follow my instructions and run this demo for yourself?
 A place for me to share what I'm learning: Azure, .NET, Docker, audio, microservices, and more...




Comments
Can we launch browsers inside containers created with Windows 10 base image?
Ritu JaniMy requirement is a container with one testing tool and a IE browser to run automated test?
currently there isn't really UI support in windows containers, so not really unless you can run the tests headless. Hopefully this sort of thing will become possible in the future
Mark HeathThanks Mark.
Ritu JaniCan we do the same thing with Linux containers?
and if yes then how we can access the agents (nodes running on particular ports) inside containers from a server located outside this container in a Windows machine.
hi Ritu, it's not something I know how to do I'm afraid. You'd be best off asking someone who's a bit more of an expert in Linux containers
Mark HeathIt's fine Mark. thanks for the help.
Ritu JaniHi Mark, it seems that the connection string from the SaveProspect console app is not correct when everything is running. Would you know anything about that problem, or in general how these containers should share the DB context?
Philip Kramerthe connection string to the db is based on the SQL password and name of the SQL container in the docker compose file I link to above. Look at the product-launch-db container which is the database, and the save-prospect-handler container which has a DB_CONNECTION_STRING environment variable. So assuming you used docker compose and all containers started successfully there is no reason it shouldn't be able to connect to the db
Mark HeathThank you Mark, it looks like my problem was that I was using an older version of the project that I had gotten from https://msdn.microsoft.com/.... That version defines a connection string in the web.config file, and also doesn't have DB_CONNECTION_STRING defined. Lucky I came across your site. And by the way I'm looking forward to trying out nAudio.
Philip Kramer